
In this post we’ll be explaining how to setup Google Analytics on your WordPress website. It is a very easy process that you can do in five minutes once you are familiar with your chosen plugin and the setup process.
Why Should I Use Google Analytics?
We could write an entire article on the importance of using Google Analytics on your website. It is a fundamental part of your website and growing your online presence, not using it is like hiking in heavy fog with no compass: you are just guessing what direction to go in.
Google Analytics tells you information such as where your visitors are coming from, what search terms they are using to find your website, how they found your site and what browsers they are using all of which is invaluable information when trying to grow your online presence.
You can also create goals and funnels to measure the performance of your site in important areas.
This is a great article on the importance of Google Analytics.
OK, I’m Sold, How Do I Install Google Analytics on my WordPress Website?
The process of setting up Analytics in WordPress is a simple process. There are a number of plugins that take care of the code implementation for you and here at Ezone we favour Monster Insights as it is always kept up to date, and is super easy to setup. There are also various levels of premium subscription available that offer a host more functionality, however, for simply connecting your site with Google Analytics the free version does the job fantastically well.
Step 1: Go to https://www.google.com/analytics and create a Google Analytics account if you don’t already have one.
Step 2: Add your property to your Analytics account:
- Sign in to Google Analytics..
- Click ‘Admin’.
- Under the ‘account column’, use the menu to select the account to which you want to add the property.
- Under the ‘property’ column, select ‘Create new property’ from the dropdown menu.
- Select Website.
- Enter the Website name.
- Enter the Web Site URL.
- Select an Industry Category.
- Select the Reporting Time Zone.
- Click ‘Get Tracking ID’.
- Copy your tracking ID (Control and C).
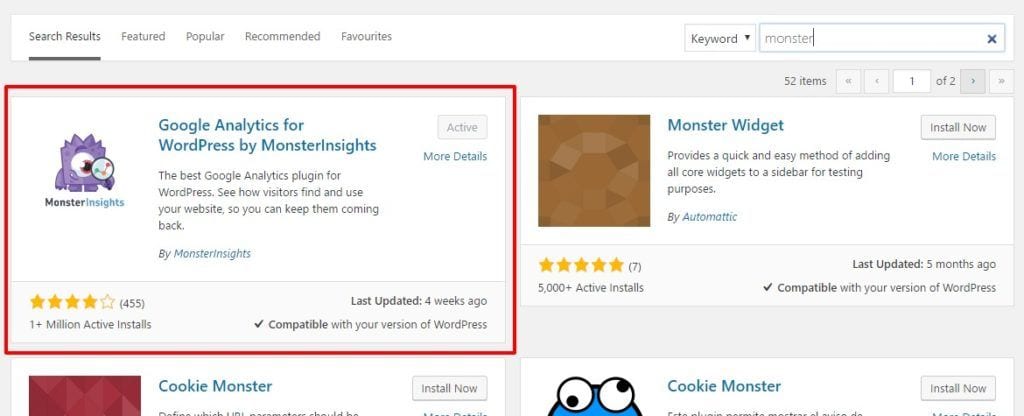
Step 3: Install the Monster Insights plugin on your website:
In your website dashboard go to Plugins > Add New and search for ‘Monster’ and install and activate the plugin.
Step 4; Configure settings in Monster Insights
- Go to ‘Insights’ > ‘Settings’ and click ‘Authenticate with your Google account’.
- Click ‘Next’.
- Click the ‘Click to Get Google Code’ button.
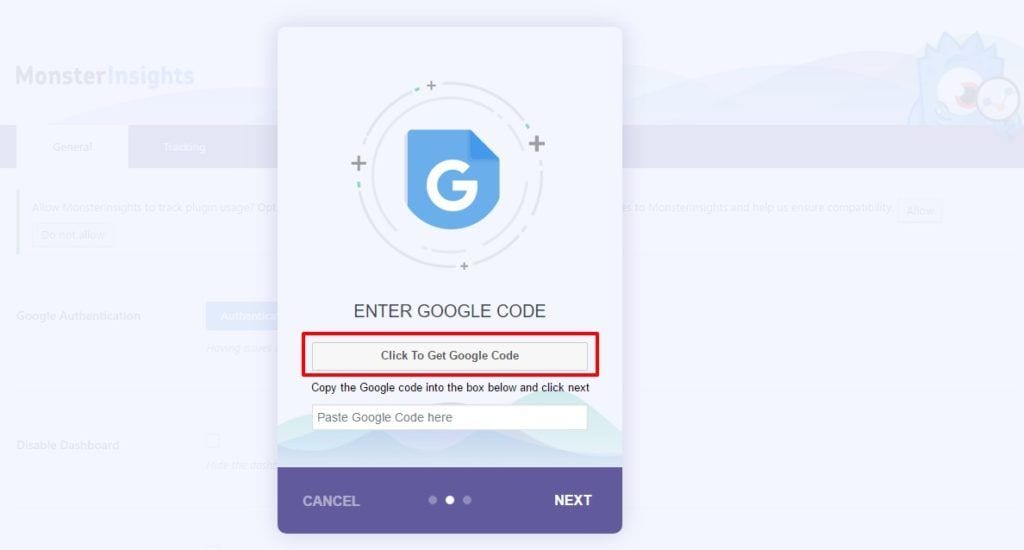
- You will be asked to allow permission for the plugin to access your Analytics account, click ‘Allow’ .
- Copy the code that is created and go back to the Authentication screen and paste in your code and click ‘Next’.
- From the ‘Analytics Profile’ dropdown select the property you want to track (if this is your first website you will only have one) and click ‘Next’.
- You’re done!

While the above may seem like quite a long process it is actually quite straightforward, especially in comparison to manually inserting the tracking code in the header of your website and once you have done it a couple of times it starts to feel like a very slick process and one that we would strongly recommend is worth taking the time to set up.
Once you have completed the above process we recommend taking some time to familiarise yourself with the Google Analytics dashboard so that you know how to review your data and setup goals and funnels. Google’s ‘Analytics Academy’ is a great place to start: https://analytics.google.com/analytics/academy/